Comprehensive Guide for Integrating 3PL Central with Brightpearl
Connect Brightpearl With 3PL Central Warehouse
To connect 3PL Central Warehouse with Integration, first, obtain the necessary permissions. Follow these simple instructions to connect your personal portal with 3PL Central.
1. Log into your Portal.
2. Navigate to 'Active Integration' and connect your 3PL account.
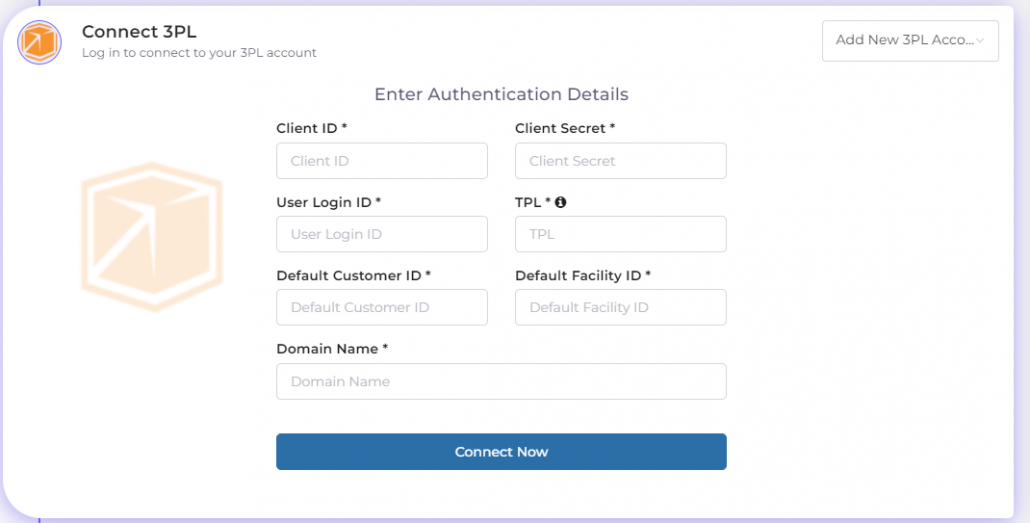
3. Enter your 3PL Central Warehouse API Credentials:
-
-
Client ID
-
TPL
-
Client Secret
-
User Login ID
-
Customer ID
-
Facility ID
-
4. Click 'Save'. Your portal is now successfully connected with 3PL Central.
-
-
Note: If you lack the above REST API Keys, contact the relevant 3PL Central Warehouse and request REST API access from their 3PL Central Customer Success Manager.
-
5. After connecting your 3PL account, map the following fields from 3PL Central:
-
-
3PL Default Account Number: Add the 3PL Central account number to push into 3PL Central when creating an order.
-
3PL Default Billing Code: Select a billing code to add to orders when syncing from Brightpearl.
-
3PL Carrier Name: Add the default carrier name for orders syncing from Brightpearl.
-
3PL Carrier Mode: Add the default carrier mode for orders syncing from Brightpearl.
-
Brightpearl Sales Order Shipping Method: Specify a shipping method for tracking number sync from 3PL Central to Brightpearl. If the 3PL order's shipping method doesn't exist in Brightpearl, the connector updates this default method.
-
Order Warehouse Filter: This filter checks GONs warehouse mapping for sync with 3PL Central.
-
Sales Order Status Filter: This checks the GON's order status. If it matches the mapped status, GONs sync to 3PL Central.
-
Note: The connector checks both warehouse and status filters before syncing GONs to 3PL Central.

Connect BrightConnect With Your Brightpearl
To connect Brightpearl with Integration, first, obtain the necessary permissions. Follow these instructions to connect your personal portal with Brightpearl.
-
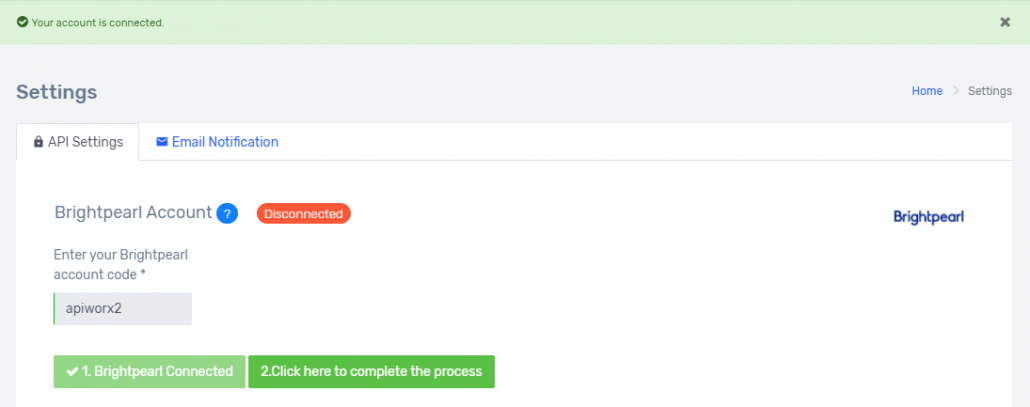
In General Settings of BrightConnect, enter your Brightpearl Account code and click 'Connect'.
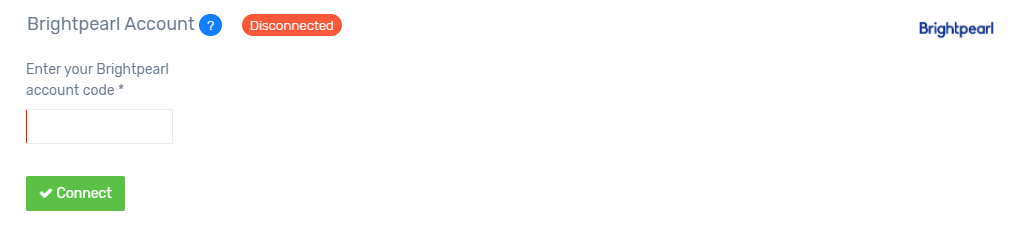
You will be redirected to the Brightpearl Login page.
2. Log into Brightpearl with your credentials.
3. Click 'Approve' to grant BrightConnect access to your Brightpearl data.
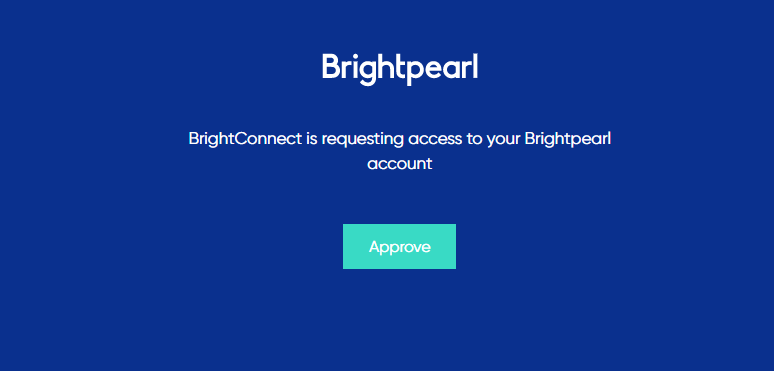
You will be redirected back to the BrightConnect General Settings page with a success message.
4. Click the second button to complete the connection process.
Once connected, the system begins fetching data from Brightpearl and notifies you upon completion. Configure the sync in BrightConnect Settings.
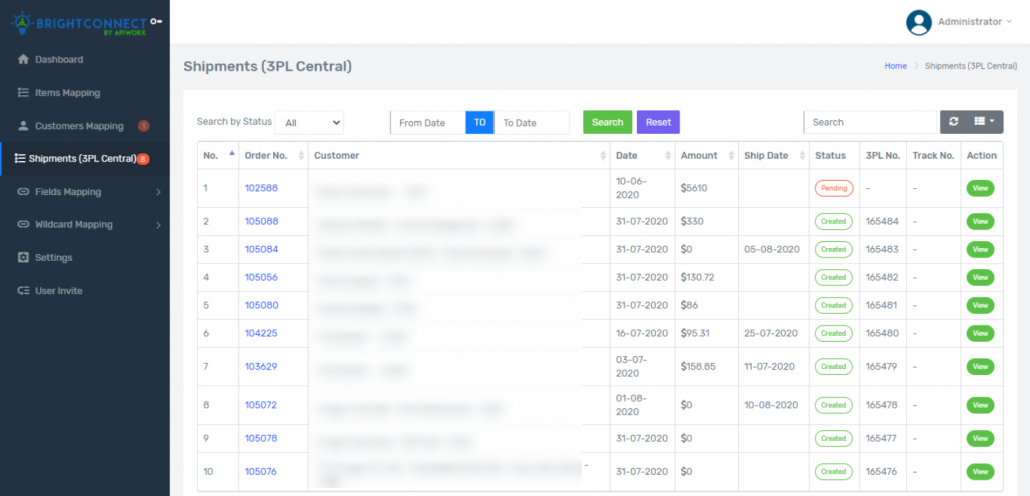
View Order Sync Logs & Stats In Dashboard
The BrightConnect Dashboard displays stats and logs for order synchronization.
Connect Brightpearl and 3PL Central Warehouse
Connect Brightpearl and 3PL Central Warehouse effortlessly without coding. Enhance your productivity with our integration.
-
Email us at contact@apiworx.com for account setup.
-
After account creation, log in with the provided details and configure your integration in the settings.
-
Connect your Brightpearl account and 3PL Central Warehouse in API settings.
How to obtain Brightpearl API keys & connect it?
How to obtain 3PLCentral API Keys & connect it?
4. In the 3PL Central tab, set the trigger for Order Sync from Brightpearl to 3PL Central.
There are two types of triggers available in the option, providing you with the flexibility to select one according to your business process.
-
Sales Order Status Update – If this trigger is selected, then you'll need to select a status at which you want the integration to initiate the syncing of Orders into 3PL Central.
-
Goods Out Note Created – If this trigger is selected, then whenever you create a Goods Out Note against a sales order, the integration will initiate the syncing of the Order into 3PL Central. (Partial Goods Out Notes are not currently supported).

5. Match Brightpearl Products to 3PL Central Items: Our portal matches Brightpearl products to 3PL Central items using the unique ID. You can select a field from both platforms where you store the unique ID of your product/item.

6. Settings for Bundled Products: If you have any bundled products, use this setting to convert bundle items into individual child items. Does your 3PL Central Warehouse maintain bundled items as in Brightpearl? If not, our integration can convert the bundled items of your order and send only the child items of the bundle. Simply switch this setting to 'ON' and you're all set!
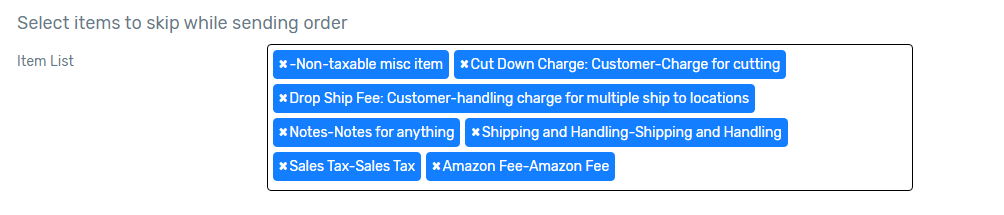
7. Add Items to Skip List for Syncing to 3PL Central: Some products/items like shipping fees, additional sales tax, or other charges may be added to orders but are irrelevant for order shipments. Use this option to add such items to the SKIP LIST, excluding them from being sent to 3PL Central with your orders.
8. Set Up a Default Warehouse in Brightpearl for Integration with 3PL Central: Under this setting, select a warehouse that corresponds to the 3PL Central Warehouse. Only orders associated with this selected Brightpearl warehouse will be synced to 3PL Central.

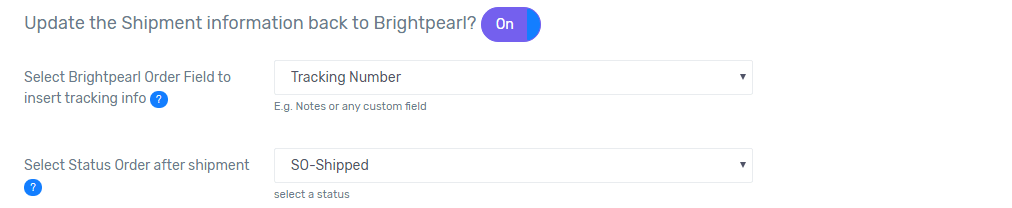
9. Configure Shipment Information Sync: In this setting, you can determine whether to sync the tracking and shipping information from 3PL Central back to Brightpearl. You'll need to select a field or custom field where the tracking number will be updated, as well as a Sales status for when the 3PL order is shipped.
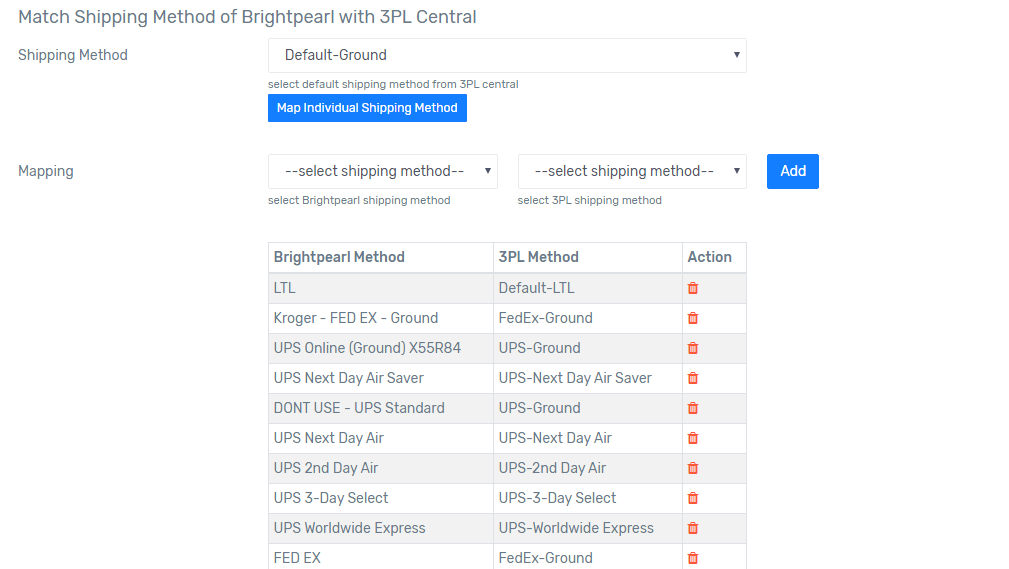
10. Map the Shipping Methods Between Platforms: Using this setting, you'll be able to match the shipping methods from Brightpearl with the available shipping methods from 3PL Central Warehouse.
You’re all set! For assistance, email us at contact@apiworx.com.