A Step-by-Step Guide to Integrating Brightpearl and BigCommerce
Getting Started: Connecting Your Accounts
Connect BrightConnect With Your Brightpearl
To connect Brightpearl with Integration, first, it requires permission. Follow the simple instructions below to connect your personal portal with Brightpearl:
Connect Brightpearl
- Go to the General Settings of BrightConnect, enter your Brightpearl Account code, and click on the "Connect" button.
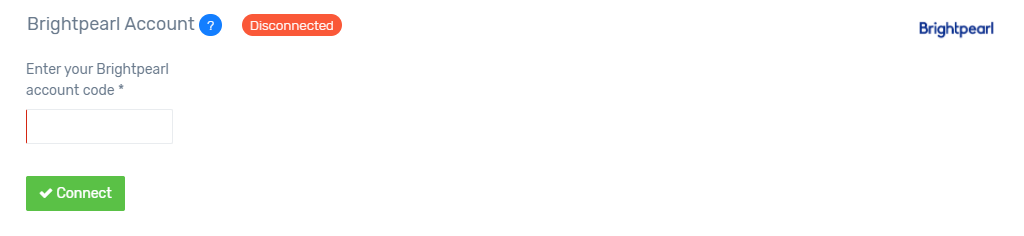
This will redirect you to the Brightpearl Login page for login (if you are not already logged in).
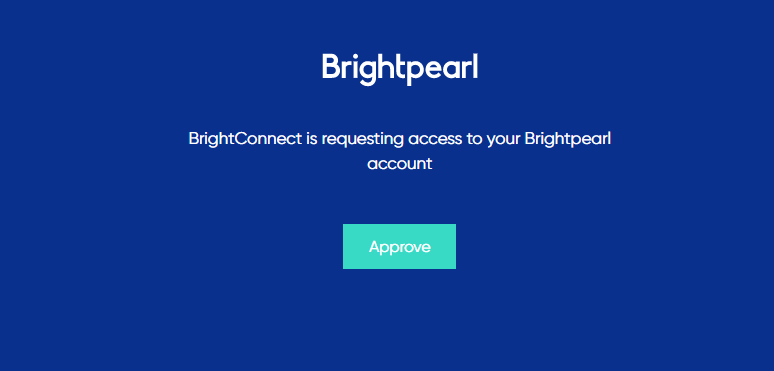
Brightpearl Login
2. Log into Brightpearl with your credentials.3. Click on “Approve” to allow BrightConnect to access your Brightpearl data.
You will be redirected back to BrightConnect’s General settings page with a success message.
Finalize Connection
4. Click on the second button, as shown below, to complete the connection process.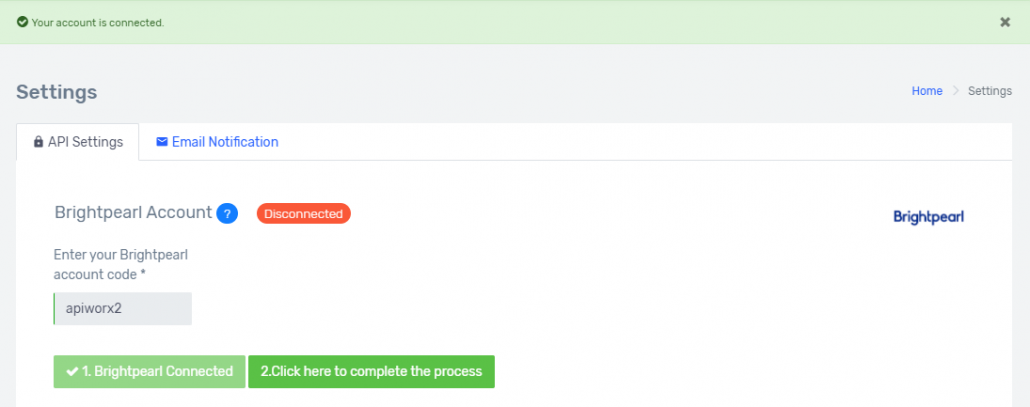
Once Brightpearl is connected, our system will start fetching all necessary data from Brightpearl and notify you via email upon process completion. You’ll need to configure the sync by going to the Settings page of BrightConnect.
Connect BrightConnect With BigCommerce Store
To connect BrightConnect with BigCommerce, follow the steps required:
Setup API Account in BigCommerce
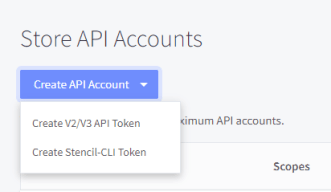
1. Log into BigCommerce.2. Navigate to “Advanced Settings” > “API Accounts” in the left sidebar menu.
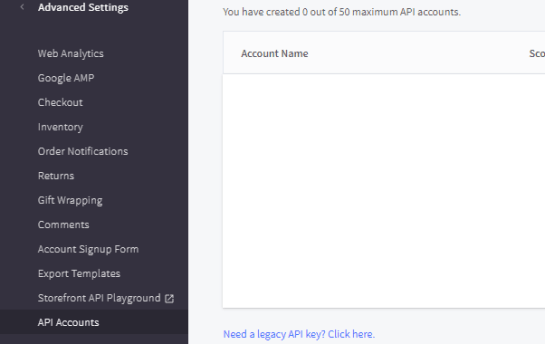
3. Click “Create API Account.”
4. Select “Create V2/V3 API Token.”
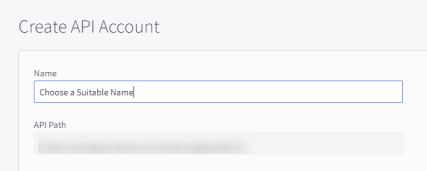
5. Choose a suitable Name.
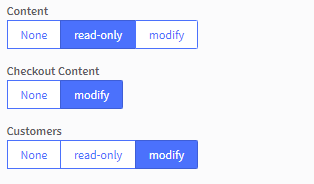
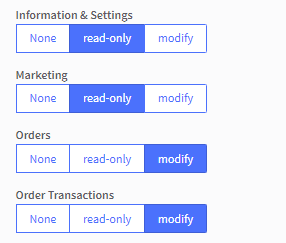
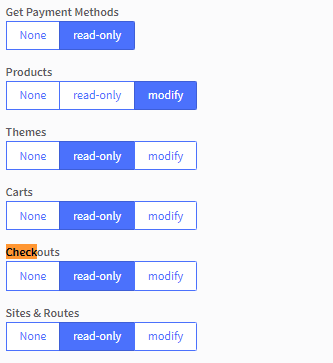
6. Fill in the OAuth Scopes, select the scopes shown below, then click “Save.”
7. The secret keys will be downloaded automatically as a text file.
Connect BigCommerce with BrightConnect
1. Go to the portal.
2. Navigate to “Settings” > “API Settings” in the left sidebar menu.
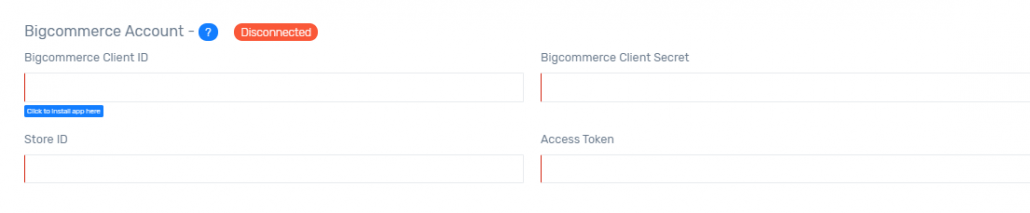
-
- Store ID: API path includes the store ID, i.e., the “xxxxxxxx” value. (API PATH: https://api.bigcommerce.com/stores/xxxxxxxx/v3/)

- CLIENT ID: xxxxxxx
- CLIENT SECRET: xxxxxx
- ACCESS TOKEN: xxxxx
4. Click “Save.”
BrightConnect is now connected with BigCommerce.
For any questions, please email us at contact@apiworx.com!
Instructions to Get Started
BrightConnect enables you to connect Brightpearl with BigCommerce, unlocking the potential to enhance your productivity significantly. Easily sync orders and shipment updates back and forth between Brightpearl and BigCommerce.
Account Setup
1. Email us at contact@apiworx.com to get an account set up for you.
Account Creation
2. Once we create an account for you, you'll receive an email with login details. Log into the Portal and go to the settings page to configure your integration.
Connect API
3. Access the API settings and connect your Brightpearl account and BigCommerce.- Learn how to obtain Brightpearl API keys and connect them.
- Learn how to obtain BigCommerce API Keys and connect them.
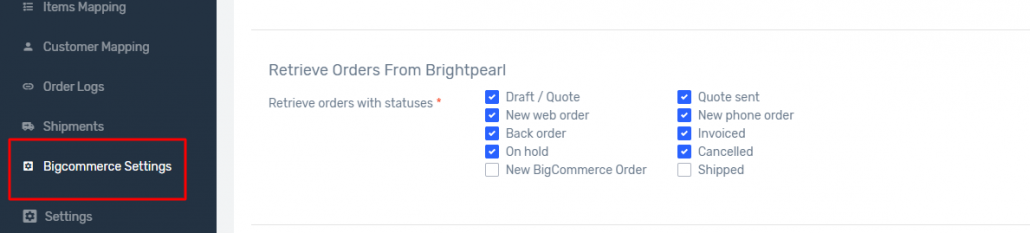
Configure BigCommerce Settings
Control the order sync in BigCommerce settings
4. This setting allows you to manage the sync of orders by selecting specific statuses from BigCommerce. The integration will only sync orders with the selected statuses. These can be updated anytime as required.

Scroll down on the same page, and you can select the same settings for Brightpearl as for BigCommerce.
On the same page, you will need to select Default Values for Brightpearl Sales.
The default values include required fields such as Channel and Warehouse, and you can also select default values for Project and Lead Source.

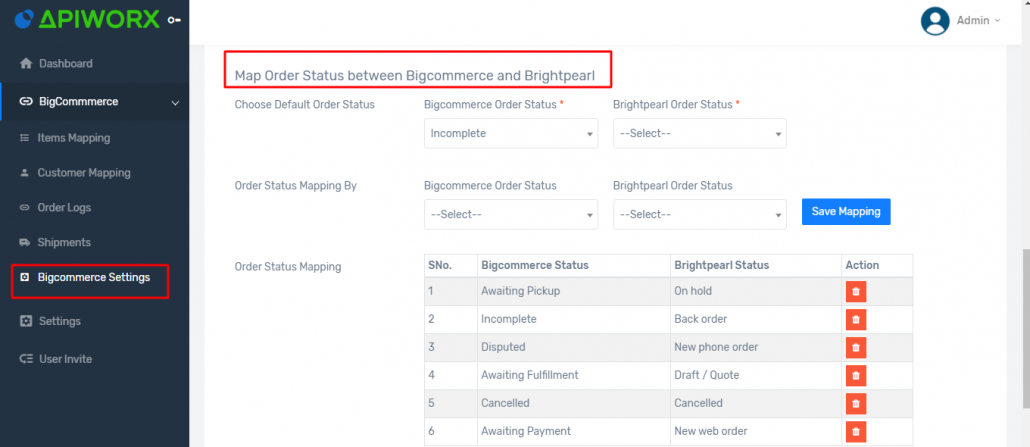
Map Order Status Between BigCommerce and Brightpearl
5. Navigate to BigCommerce Settings to map your BigCommerce and Brightpearl order statuses. Simply select the desired values from the dropdown menu.
Additionally, you can choose a default value for mapping, should you prefer not to map order statuses specifically.
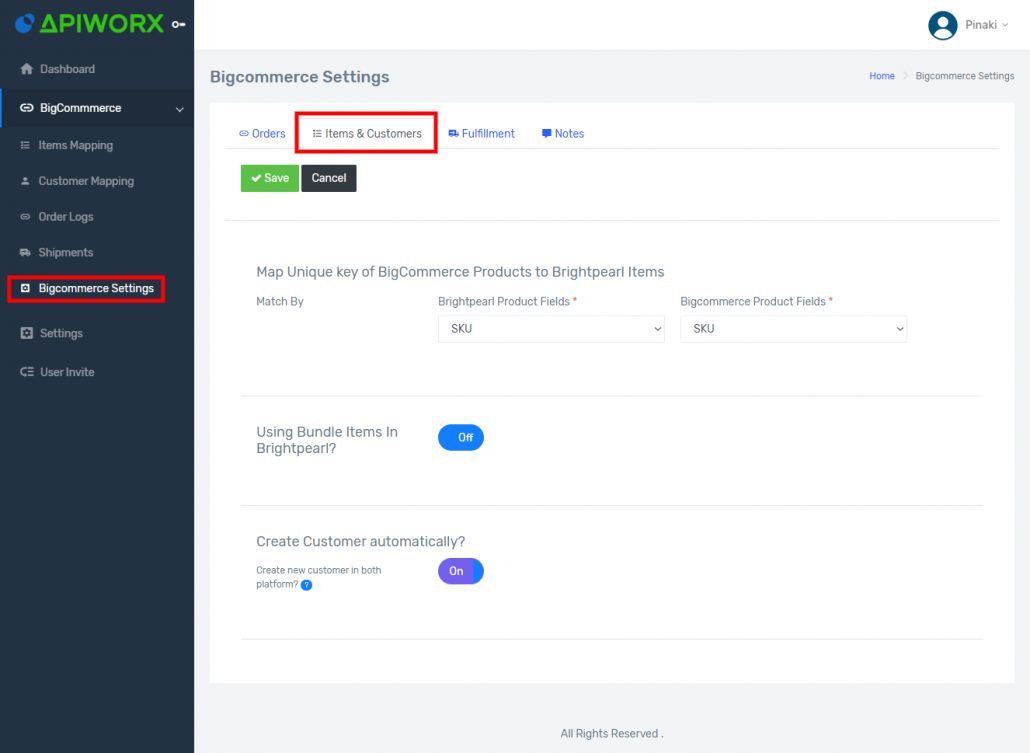
Items & Customers in BigCommerce Settings
6. In this section, you can match your product's unique fields between platforms.
Additionally, we offer the option to automatically create a customer. If this feature is enabled (“ON”) and an order comes from a customer whose email does not exist, our integration will automatically create them as a customer in Brightpearl.
Note: If the email already exists, we will update the customer's details if there are any differences from their initial entry.
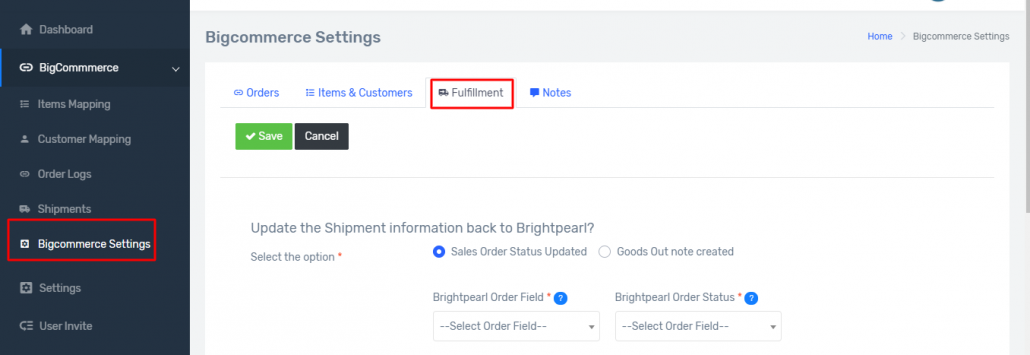
Fulfillment in BigCommerce Settings
7. In this section, set the trigger for Shipment Sync from Brightpearl to BigCommerce.
There are two types of triggers available, providing you with the flexibility to select one according to your business process:
Sales Order Status Update: If this trigger is selected, you will need to choose a status at which you want the integration to initiate the syncing of Shipment/Fulfillment information into BigCommerce.
Goods Out Note Created: If this trigger is selected, then whenever you create and mark a Goods Out Note as shipped against a sales order, the integration will initiate the syncing of shipment information to BigCommerce (only for orders sourced from BigCommerce).
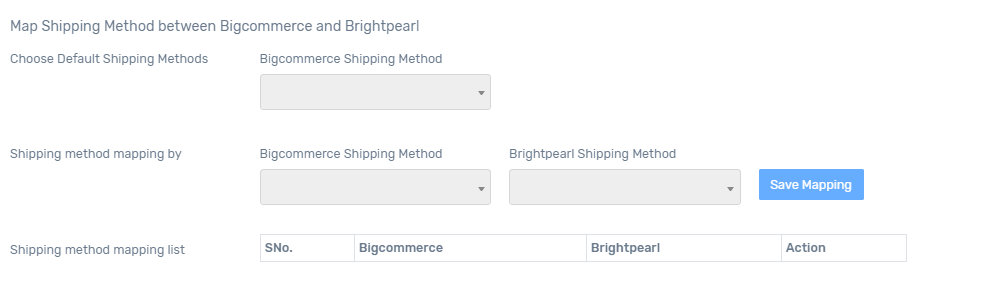
After mapping, choose the Shipping Method between BigCommerce and Brightpearl.
You can either select a default value for both or opt to choose from fields in the dropdown menu according to your preferences. The chosen mappings will be displayed as a list on the same page, allowing for future updates to help avoid confusion. (Note: This setup step is optional.)
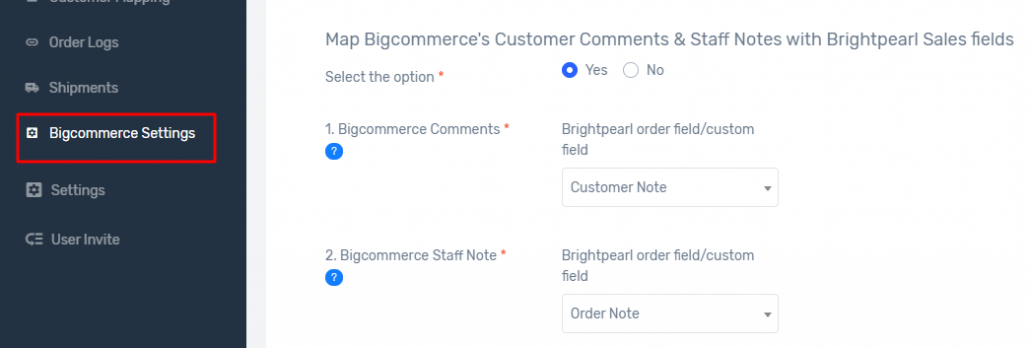
Notes in BigCommerce Settings
8. In this section, you have the option to map BigCommerce’s Customer Comments and Staff Notes with Brightpearl Sales fields. This is a required step.
Simply select one corresponding field from both Brightpearl and BigCommerce to update with Comments and Staff Notes, using the dropdown menu.
The configuration of settings is now complete.