Configuration Setup of Brightpearl and CS-Cart to ESB App
After completing the login process, you can proceed to the final step, i.e., the configuration setup. This ensures that all your data flows correctly between both platforms according to your requirements.
Note: All data is required to start the synchronization between both platforms.
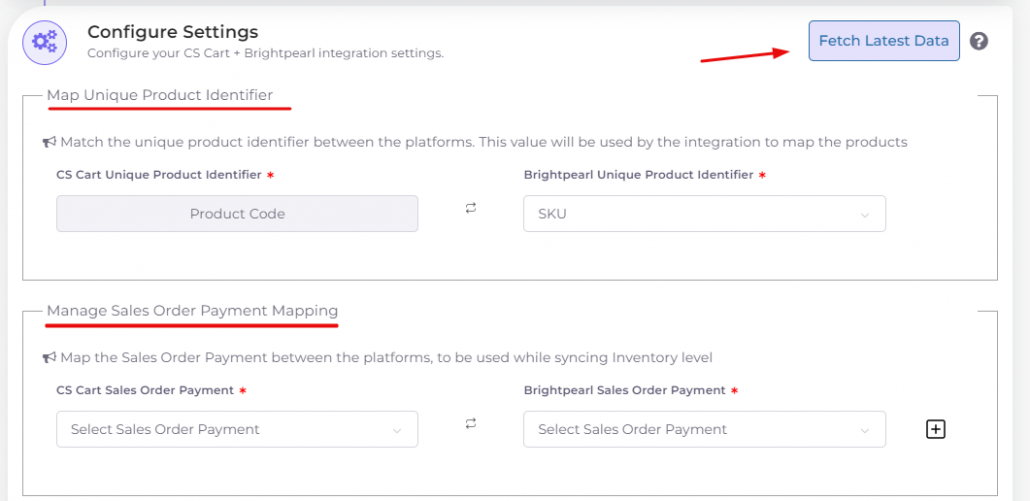
Click on "Fetch Latest Data" and then begin the process outlined below.
1. Map Unique Product Identifier: This helps match items across both platforms. As CS-Cart uses “product code” by default, it will be auto-selected. However, you can map it with Brightpearl as needed (e.g., adding SKU, MPN, UPC, etc., from the dropdown provided).
2. Manage Sales Order Payment Mapping: This section offers dynamic mapping options. Click on the '+' icon to add more rules, helping you map your payment method flow across both platforms.
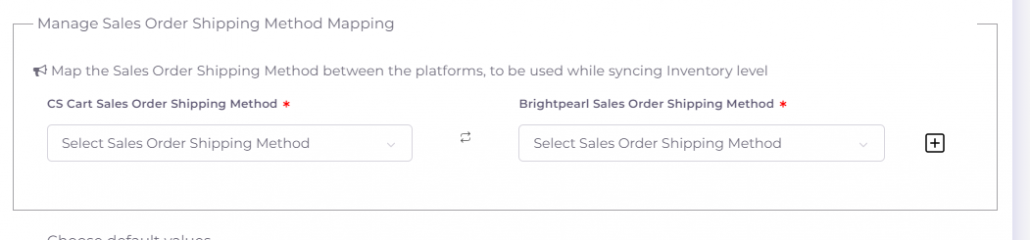
3. Manage Sales Order Shipping Method Mapping: Similar to payment mapping, this section provides dynamic mapping for shipping methods. Click on the '+' icon to add rules, facilitating the mapping of your shipping method flow on both platforms.
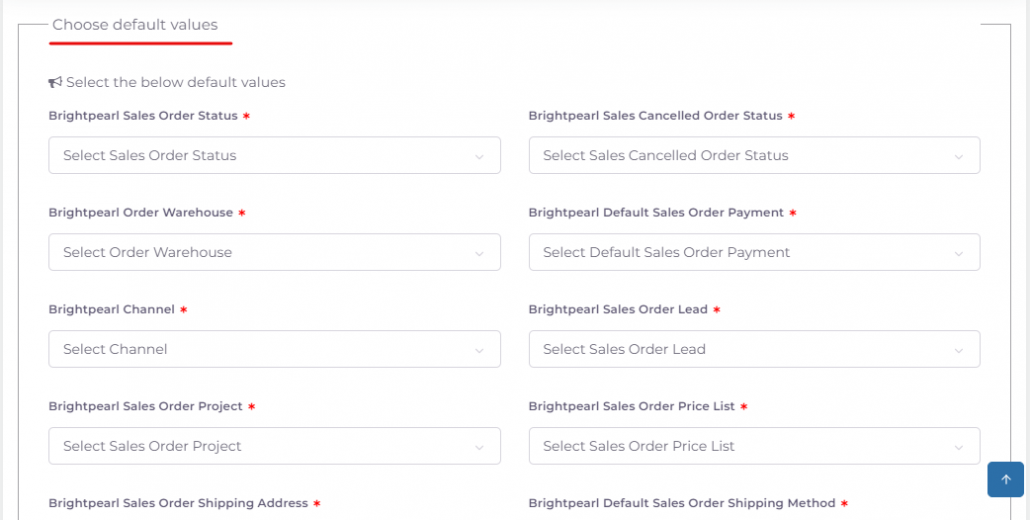
4. Choose Default Values: Some fields are mandatory in Brightpearl for creating a product. When importing items from CS-Cart to Brightpearl, not all data may be available. To prevent product creation failures in Brightpearl, set up default values in this section.
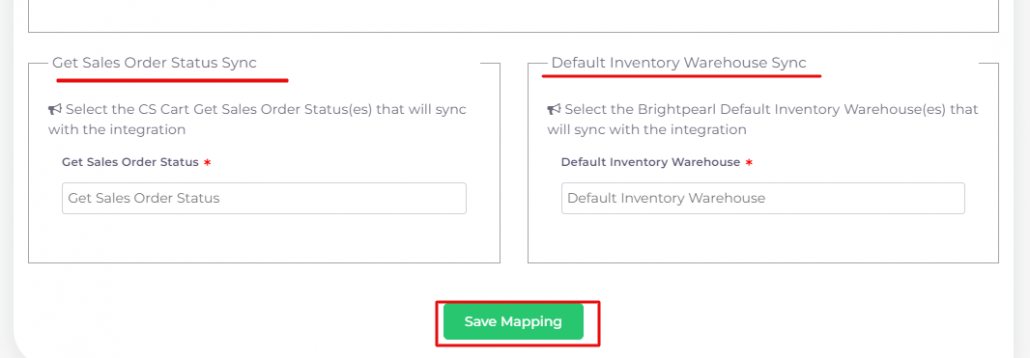
5. Get Sales Order Status Sync: This feature allows you to sync only those orders from CS-Cart that you want to see in Brightpearl. Select the order status from the CS-Cart dropdown, and only orders with that status will be synced to Brightpearl.
6. Default Inventory Warehouse Sync: Control the inventory updates from Brightpearl to CS-Cart. Whenever you update the inventory of any warehouse, it will also update in CS-Cart. Multiple options are available for selection.
7. Save Mapping: Ensure to save your configurations after completing the mapping.
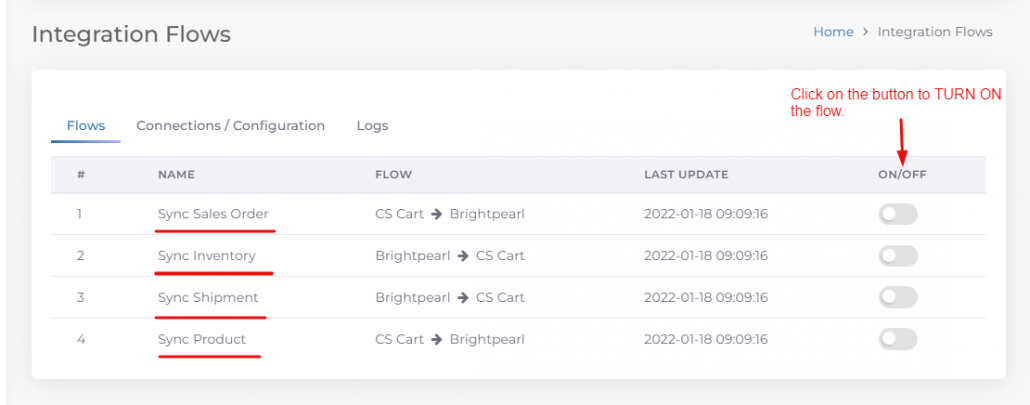
8. Integration Flows: Control which elements to sync on both platforms. Only items set to “ON” status will be synchronized; others will remain inactive.
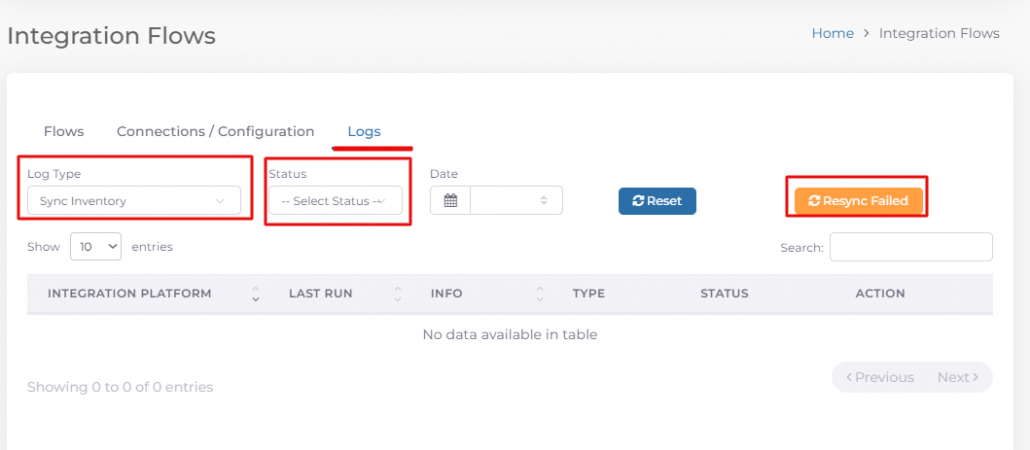
9. Check Logs: After enabling synchronization in point 8, review the logs by selecting the log type and status from the dropdown. This allows you to view if any item/order fails to sync, along with the reason for failure.
For any doubts, please contact us at support@apiworx.com.