Seamless Integration of AmazonVendor Central and Brightpearl with ESB: A Comprehensive Guide for Efficient Synchronization
Getting Started: Connecting Your Accounts
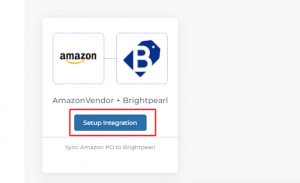
Get Started with the “AmazonVendor Central and Brightpearl” Connector
To connect Brightpearl and AmazonVendor with ESB, you first need to grant permission. Follow the simple instructions below:
1. Use the following URL for registration:
Registration URL: https://esb.apiworx.net/login
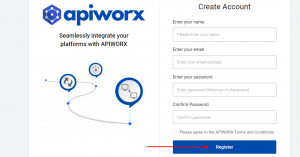
2. The registration process consists of two steps. First, fill in the following details: Name, Email, and Password (the password should have a minimum of 8 characters).
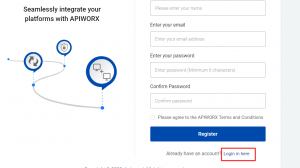
3. After entering all the required details, click on the “Register” button.
4. After registration, click on “Login”.
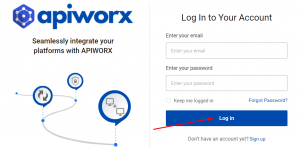
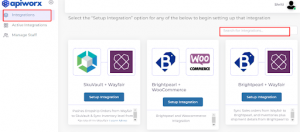
5. Once logged in, on the home page, search for “Integration Name” in the search bar and click on it. (You can enter any friendly name to remember this connection).
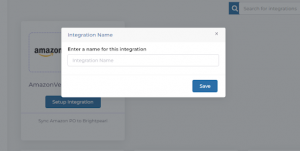
Set up the integration and enter the setup integration ID, then click on the “Save” button.
6. After logging in, the “Integrations” dashboard will open.
8. Step 8: Enter a friendly name for this integration flow.
9. After creating the name, go to the active integration and click on the “Connect Now” button.
Follow the Steps to Connect Brightpearl and AmazonVendor with ESB
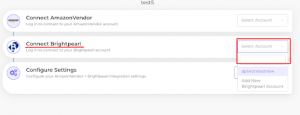
You will be prompted to connect your Brightpearl account, AmazonVendor Central, and configure the settings.
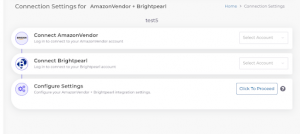
Connect Your Brightpearl Account:
- Step (A): Start by connecting your Brightpearl account. Click on “Add new Brightpearl Account,” and you will be redirected to your Brightpearl account login page.
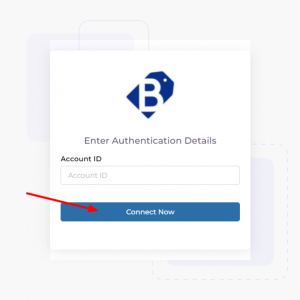
- Step (B): Enter your Brightpearl Account ID (the one you use for logging in) and click on the “Connect Now” button.
- Step (C): Log in to Brightpearl using your credentials.
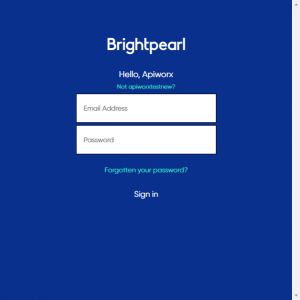
- Step (D): Click on “Approve” to grant ESB access to your Brightpearl data.

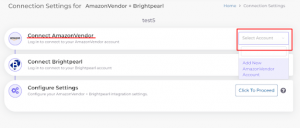
Connect Your AmazonVendor Account:
Step: Click on “AmazonVendor Select Account” and then add a new AmazonVendor account by following these steps:
1. Invite APIworx as a User: You will need to invite us to your AmazonVendor account with access to review the integration menu, PO, and shipment. Please send an invite to manpreet@apiworx.com.
2. AWS Console Access: This integration requires AWS console login details rather than the vendor central part. If you do not have an AWS account, you can sign up at https://aws.amazon.com/console.
Configuration Setup of Brightpearl and AmazonVendor to ESB App
After completing the login process, you can proceed to the final step, i.e., the configuration setup. This step ensures that all your data flows correctly between both platforms according to your requirements.
All data is required to initiate the synchronization between the two platforms.
Note: Click on the "Proceed" button and start the process outlined below.
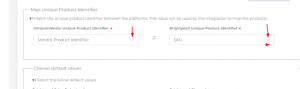
1. Map Unique Product Identifier: This will help match items across both platforms. As AmazonVendor Central only uses “product code,” it will be auto-selected. However, you can map it with Brightpearl as per your need (e.g., you can add SKU, MPN, UPC, etc., from the dropdown provided).
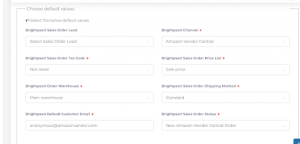
2. Choose Default Values: Some fields are mandatory in Brightpearl for creating orders, but when importing items from AmazonVendor Central to Brightpearl, not all data may be available. To prevent product creation failures in Brightpearl, you will need to provide default values. Set up these values in the following sections:
- Channel: Select the Brightpearl channel where you want your AmazonVendor order details to be uploaded.
- Lead Source: Choose a lead source for the connector, such as word of mouth or Google.
- Price List: Set a default price list for creating orders in your selected AmazonVendor location.
- Tax Code: Select a unique Tax Code assigned to contact records, product records, and transactions. This code controls the total tax rate applied to a transaction.
- Warehouse: Choose a default warehouse for creating orders in your selected AmazonVendor warehouse.
- Shipping Method: Set a default shipping method that will be used in AmazonVendor from Brightpearl when creating an order.
- Order Status: Select the Brightpearl order statuses that will sync to AmazonVendor (e.g., sync only orders with 'Pending' status in Brightpearl). Multiple statuses can be selected.
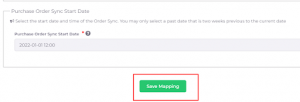
3. Start Date and Time: Set a Start Date and Time from which the system will begin syncing orders. Note that you may select a past date, up to two weeks before the current date.
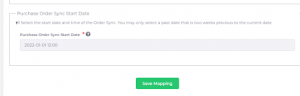
4. Save Mapping: After completing the mapping, click on the “Save Mapping” button.