Streamlining Operations with Lightspeed Retail and Brightpearl Integration
Getting Started with Lightspeed Retail and Brightpearl Connector
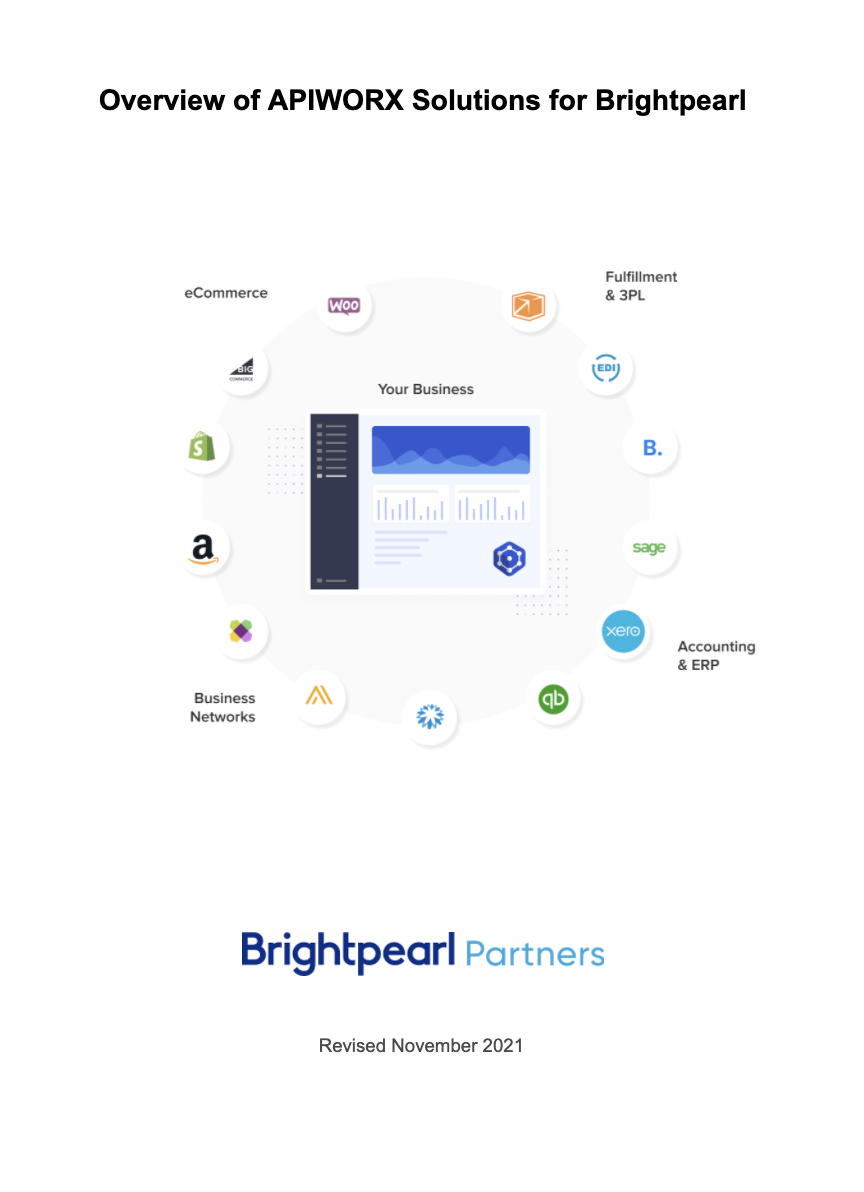
BrightConnect enables you to connect Brightpearl with Lightspeed Retail, allowing for easy synchronization of products, inventory levels, and orders, along with shipment updates between the two systems.
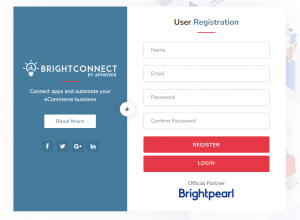
1. Account Registration
Register by entering basic details like Name, Email ID, and Password here.
Connecting Brightpearl and Lightspeed Retail
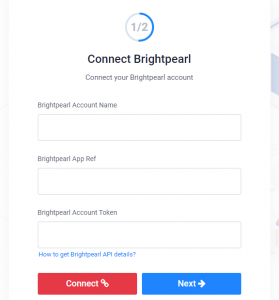
- Brightpearl Account Connection: Requires permission. Enter your Brightpearl Account ID, Brightpearl App Ref., and Account Token.

How to Obtain Brightpearl Credentials
2. Log into your Brightpearl account and click on the App Store.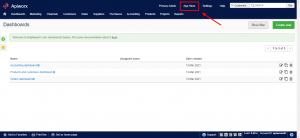

4. Click on Add Private App.

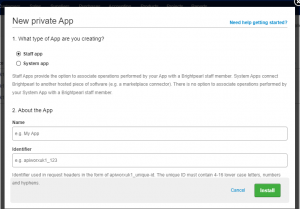
5. A pop-up will appear where you'll need to select the App type, i.e., Staff App, and then enter the Name of the app and an Identifier. After inputting all the required information, click on the Install button.
6. You will receive a confirmation message indicating success. You will then be able to view the Reference and Token in the corresponding columns of the displayed table, as shown below.
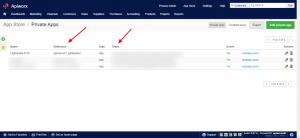
7. Copy the Reference and Token, then return to the onboarding process and use them for the Brightpearl login.
2. Connecting Lightspeed Retail Account
-
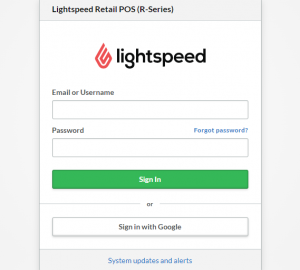
Agree to the Terms of Service and click Connect. This redirects to the Lightspeed Retail login page.
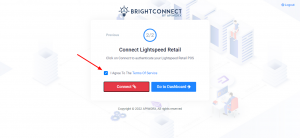
2. Log in with your Lightspeed Retail credentials.
3. Click Authorize Application to grant access rights to BrightConnect.
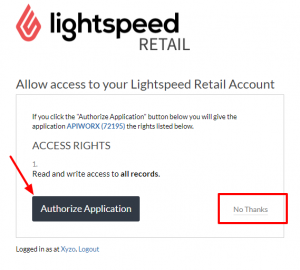
You will be redirected back to the Onboarding Steps to continue the process.
4. Select your Lightspeed Retail Location to retrieve orders into Brightpearl. Choose your Lightspeed Retail Currency according to your location. If the Lightspeed Currency differs from Brightpearl's, enter a conversion rate of 1 for the selected currency; if they are the same, no conversion is needed.
5. After inputting all the details, simply click on the 'Go to Dashboard' button to complete the process!
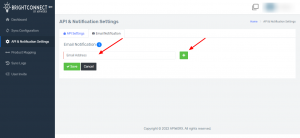
API & Notification Settings Setup
In the BrightConnect Connector, on the left side, you will find the API & Notification Settings page, which consists of two modules: API Settings and Email Notification.
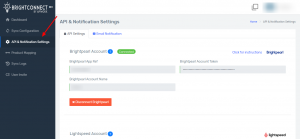
1. The API Settings in the BrightConnect Connector enable you to manage both Brightpearl and Lightspeed Retail accounts easily. If you wish to disconnect your connected Lightspeed account, simply click the Disconnect button. To reconnect, follow the same steps outlined in the Connecting Brightpearl and Lightspeed Retail with BrightConnect section.
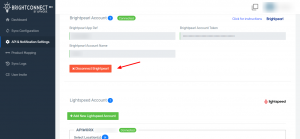
Note: For those with multiple Lightspeed Retail Locations wishing to connect them to a single Brightpearl Account, you can easily add these locations. Simply click on the +Add new Lightspeed Account button under the Lightspeed Account section and select the desired Lightspeed Retail Location.
2. Email Notification Tab, here, you can input your email address to receive notifications in case of errors or issues with data synchronization. Additionally, if you wish to add multiple email IDs for receiving these alerts, simply click the + button to include them.
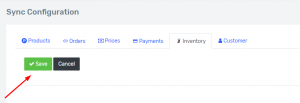
Orders Sync Configuration
In the BrightConnect Integration interface, located on the left side, there's a Sync Configuration page. This page enables you to control and manage the synchronization of various types of data between Lightspeed Retail and Brightpearl. It comprises six modules: Products, Orders, Prices, Payments, Inventory, and Customer.
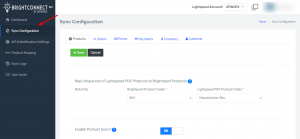
Product Sync Configuration
Navigate to the Products tab to configure the field mappings for product synchronization between Brightpearl and Lightspeed Retail.
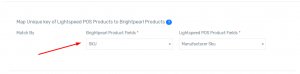
1. Select Unique Identifier Fields: Choose fields from both Lightspeed Retail and Brightpearl platforms that hold a unique identifier common to each product across both platforms.
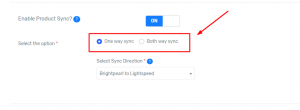
2. Enable Product Sync Flow: Activate the product synchronization from Brightpearl to Lightspeed Retail. This includes two types of sync flows:
- One-Way Sync: Products will synchronize in one direction only. For instance, selecting Brightpearl to Lightspeed Retail means products will sync from Brightpearl to Lightspeed Retail, and not the other way around.
- Both-Way Sync: Products will synchronize between both platforms. For example, creating a product in Brightpearl will update it in Lightspeed Retail, and vice versa.
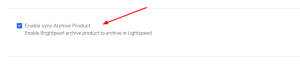
3. Enable Sync for Archived Products: Activate the synchronization of archived products from Brightpearl to Lightspeed Retail, ensuring archived products in Brightpearl sync as archived in Lightspeed.
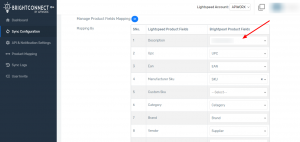
4. Review and Adjust Product Field Mapping: Examine and modify the Product Field Mapping according to your product setup on both platforms. For instance, map the 'Product Description' field from Brightpearl to the corresponding field in Lightspeed Retail, ensuring descriptions transfer accurately during synchronization.
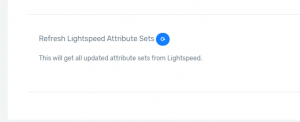
5. Refresh Lightspeed Attribute Sets: Use the Refresh button to update any newly added attributes in Lightspeed Retail, ensuring they are included in the synchronization.
6. Save Product Field Mapping: Once all mappings are finalized, click the 'Save' button to preserve these settings.
Orders Sync Configuration
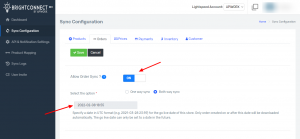
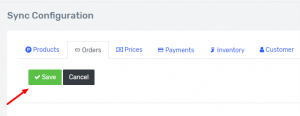
Navigate to the Orders tab to activate the synchronization of orders from Lightspeed Retail to Brightpearl.
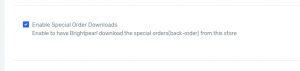
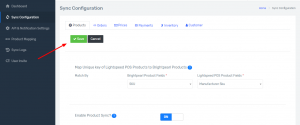
3. Automatic Fulfillment of Lightspeed POS Orders: Turn on the option to automatically fulfill and ship Lightspeed POS orders with a "fulfilled" status in Lightspeed Retail. Otherwise, these orders will download as not fulfilled in Brightpearl.

4. Allow Sales Credit: Enable this feature to ensure that refund orders from Lightspeed Retail are created in Brightpearl as sales credits.

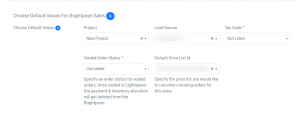
5. Set Default Values for Order Creation: Configure default values for orders created in Brightpearl from Lightspeed Retail:
- Project: Choose the project status to categorize orders.
- Lead Source: Select a lead source to track the origin of orders, such as Google or other Lead Sources.
- Tax Code: Choose a unique Tax Code for contact records, product records, and transactions. This controls the total tax rate applied to transactions.
- Default Price List-ID: Set a default price list for order creation in your chosen Lightspeed Retail location.
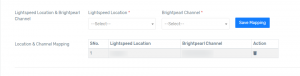
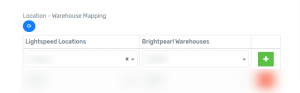
6. Map Lightspeed Retail Location with Brightpearl Channel: Link each Lightspeed Location with the corresponding Brightpearl Channel for syncing orders. Save your settings with the Save Mapping button.
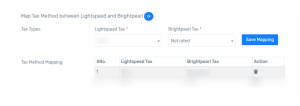
7. Tax Method Mapping: If Lightspeed and Brightpearl have different tax codes, map them by selecting a Tax Method. This enables one-to-one tax code mapping between both platforms. Save your settings with the Save Mapping button.
8. Map Lightspeed Retail Location with Brightpearl Warehouse: Align each Lightspeed location with multiple Brightpearl warehouses for accurate inventory allocation. Confirm your settings with the Save Mapping button.

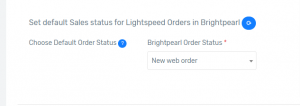
9. Default Sales Order Status Setting: Establish a default order status for orders from Lightspeed Retail to Brightpearl.
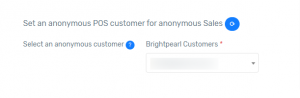
10. Select Default Customer: Choose a default customer ID in Brightpearl for orders from Lightspeed Retail without a customer ID.
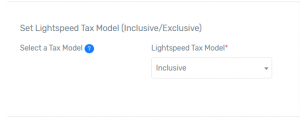
12. Lightspeed Tax Model Status: Sync the tax model status from Lightspeed Retail with Brightpearl to ensure consistent tax handling.
13. Save Order Field Mapping: Once all mappings are finalized, click the 'Save' button to preserve these order field mappings.
Prices Sync Configuration
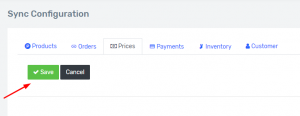
Navigate to the Prices tab to activate the synchronization of prices from Brightpearl to Lightspeed Retail.
- Select the default currency for Lightspeed Retail.
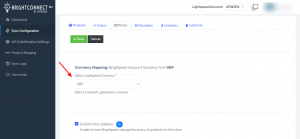
2. Enable the 'Price Update' feature, allowing Brightpearl to control product pricing for your chosen Lightspeed Retail location. Additionally, establish a default pricing structure from Brightpearl's price list for Lightspeed Retail's default price.

3. Once you have completed all the necessary mappings, click on the Save button to preserve your price field configurations.
Payment Sync Configuration
Navigate to the Payments tab to activate the synchronization of payments from Lightspeed Retail to Brightpearl.
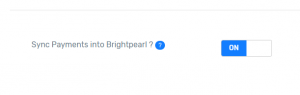
1. After enabling payment synchronization, set a Default Payment Method from Brightpearl to be used by the system when syncing payments from orders originating from Lightspeed Retail to Brightpearl. Additionally, you have the option to map other Payment Method between the two platforms as per your preference.
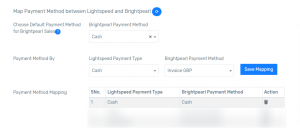
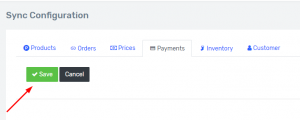
2. Once you complete the mapping process, click on the Save button to preserve all your payment field mappings.
Inventory Sync Configuration
Navigate to the Inventory tab to activate inventory synchronization from Brightpearl to Lightspeed Retail.
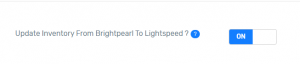
1. Map the Lightspeed Location to Brightpearl's Warehouse. This ensures that any updates in the inventory levels of Brightpearl's Warehouse are reflected in the corresponding Lightspeed location. Additionally, you have the option to associate multiple Brightpearl warehouses with multiple Lightspeed locations by using the '+' button.
2. Once the mapping is complete, click on the Save button to preserve all the inventory field mappings.
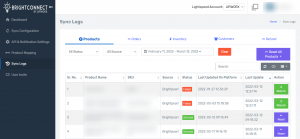
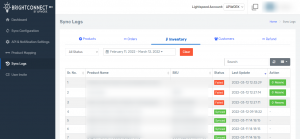
View Sync Logs
Under the Sync Logs, you can review and manage different logs, namely Product, Inventory, Orders, Customers, and Refund.
- In the Product Sync Logs, the following fields are displayed
i. Product Name – This column displays the product name from Brightpearl that is synced to Lightspeed Retail.
ii. SKU – This column shows the SKU of the product from Brightpearl.
iii. Source – This indicates the origin of the product creation.
iv. Sync Status – This column shows the product sync status from Brightpearl to Lightspeed, with four possible statuses: Pending, Synced, Failed, and Processing.
- Pending typically means that the product needs classification to set the appropriate Lightspeed Category and other settings.
- Synced indicates products that have been successfully synced and are live in Lightspeed Retail.
- Failed is for products that have not been processed due to various reasons (the reason for failure will also be displayed).
- Processing is for products sent to Lightspeed for listing but are still in the process of going live.
v. Last Updated on Platform – Shows when our system last fetched the product from Brightpearl and updated it in Lightspeed.
vi. Action – This column presents a 'Re-sync' button for products that failed to sync, allowing you to attempt the sync again after addressing the cause of the failure.
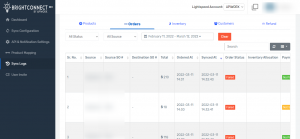
2. In the Orders Sync Log, the following fields are displayed
- Source – Indicates the origin of the orders.
- Order ID – Displays the ID of the Lightspeed Retail Order that was processed for syncing.
- Source SO ID – Shows the Brightpearl Sales Order ID when it was created from Lightspeed Retail to Brightpearl.
- Total – Represents the total amount of the order.
- Order Status – This column displays the order sync status from Brightpearl to Lightspeed. It includes four types of statuses: Pending, Synced, Failed, and Processing.
- Pending typically means that some settings are not configured or the sync is in progress.
- Synced indicates orders that have been successfully synced.
- Failed is for syncs that haven’t been processed due to various reasons (the reason for failure will also be displayed).
- Processing is shown for orders that are in the process of being sent to Brightpearl.
-
Action – This column includes a 'View' button that allows you to see full order details and the reason for sync failure, if any. It also includes a 'Resync' button for resynchronizing failed orders.
- Product Name – Displays the name of the product whose inventory was updated.
- SKU – Shows the SKU (Stock Keeping Unit) of the product.
- Sync Status – Indicates the status of the product sync from Brightpearl to Lightspeed. It includes four types of statuses: Pending, Synced, Failed, and Processing.
- Pending typically means that some settings are not configured or the sync is in progress.
- Synced indicates those inventories that have been successfully synced.
- Failed is for syncs that haven’t been processed due to various reasons (the reason for failure will also be displayed).
- Processing is shown for inventories that are in the process of being sent to Lightspeed.
- Action – This column includes a 'Resync' button, allowing you to attempt the sync again in case any inventory failed to sync initially.
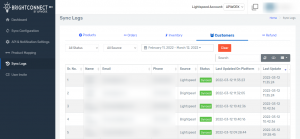
- Name – Shows the names of the customers.
- Email – Displays the email addresses of the customers.
- Phone – Indicates the contact numbers of the customers.
- Source – Reveals the platform from which the customers have placed their orders.
- Status – Provides insight into the sync status of the customers, showing four possible statuses: Pending, Synced, Failed, and Processing.
- Pending typically indicates that some settings are not configured or the sync is in progress.
- Synced is for those customers whose data have been successfully synchronized.
- Failed pertains to data that failed to sync, with the reason for failure also displayed.
- Processing is shown for customers whose data are in the process of being synchronized.
- Action – This column includes a 'Resync' button, allowing you to attempt the sync again if any customer's data failed to sync initially.
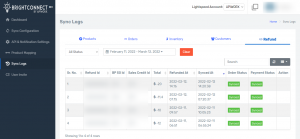
- Refund ID – Displays the ID of the Return Order.
- BP SO ID – Shows the Brightpearl Sales Order ID of the returned orders.
- Sales Credit ID –
- Order status – Indicates the status of the refund orders with four possible statuses: Pending, Synced, Failed, and Processing.
- Pending typically signifies that some settings are not yet configured or the sync is currently in progress.
- Synced refers to those refund orders that have been successfully synchronized.
- Failed denotes orders that failed to sync, with the reason for the failure also indicated.
- Processing is shown for refund orders that are in the midst of the syncing process.
- Action – Includes a 'Resync' button, allowing you to retry the sync if any orders fail to synchronize initially.