A comprehensive guide on connecting and configuring Woocommerce and Brightpearl Integration.
Connecting Your Accounts
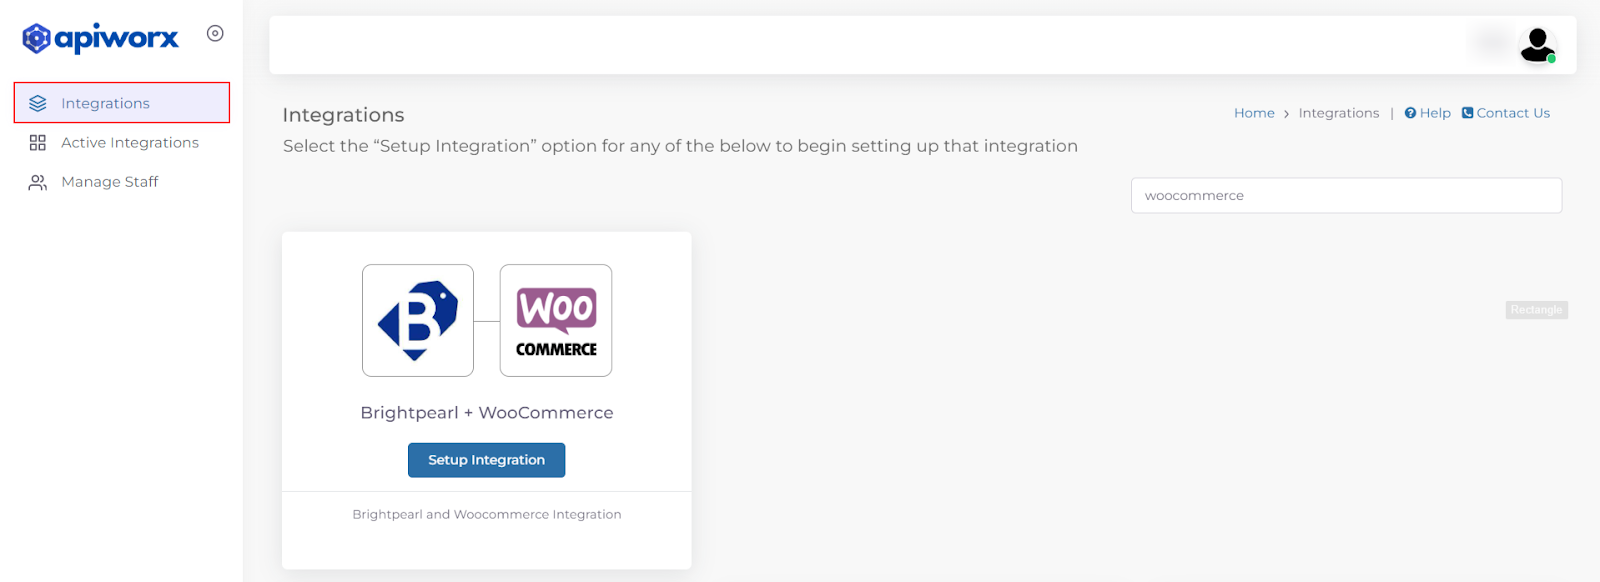
- Login to the ESB Connector: Use the shared login credentials.
- Locate Integration: Search for Woocommerce-Brightpearl integration and click on the 'Set-up Integration' button.
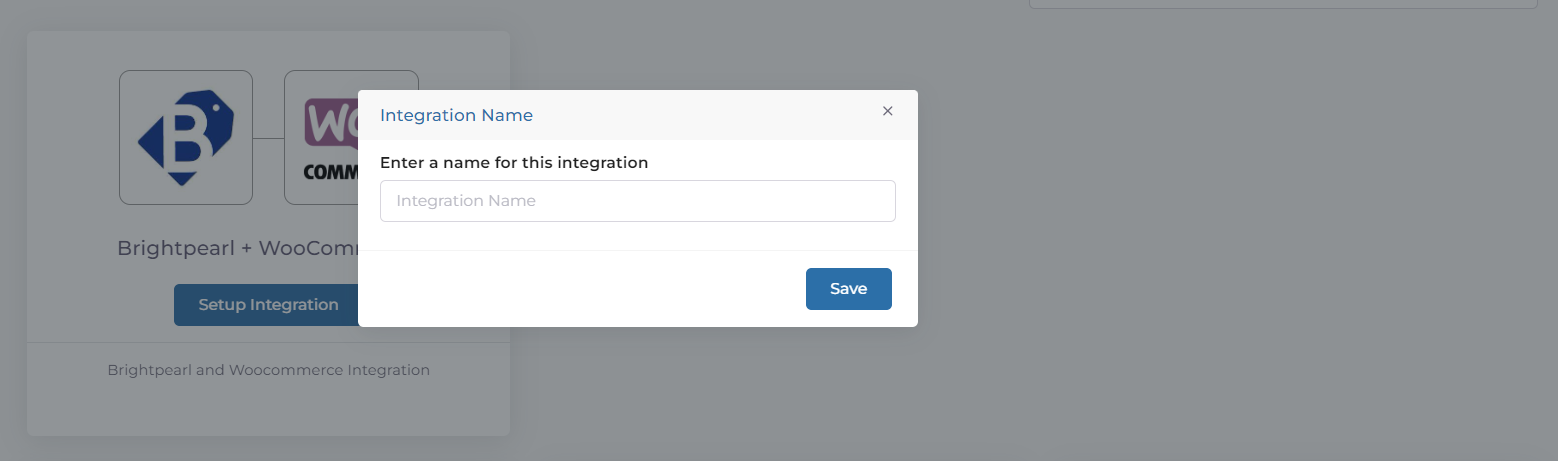
- Enter a Friendly Name: For the integration and save it.
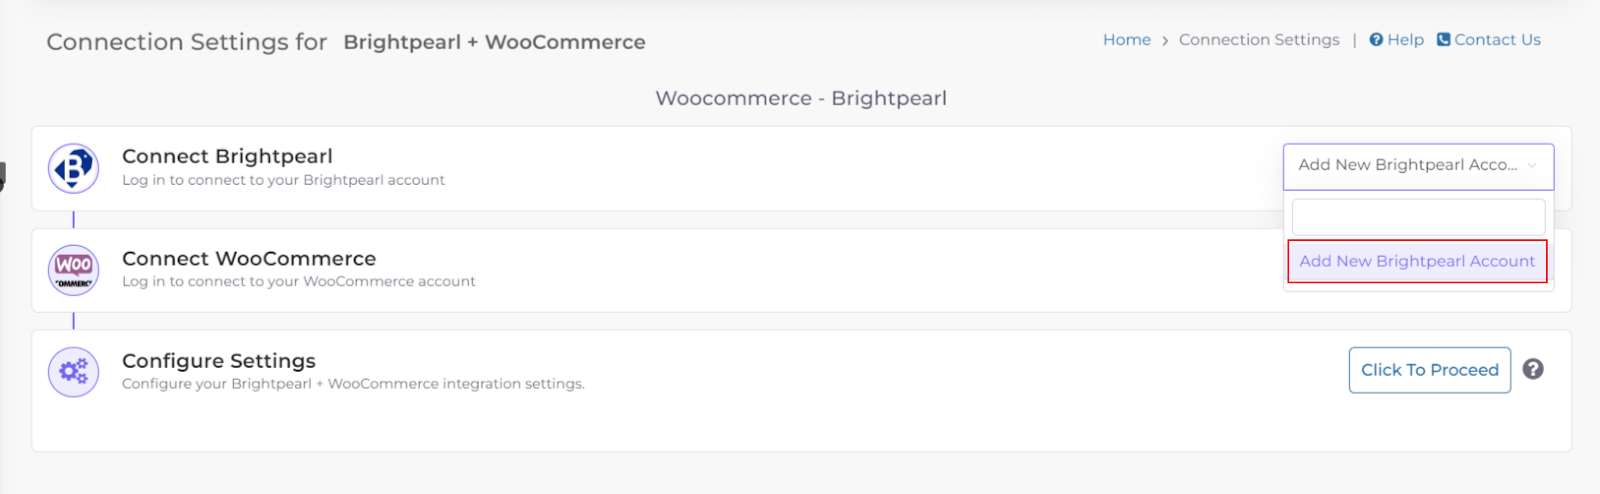
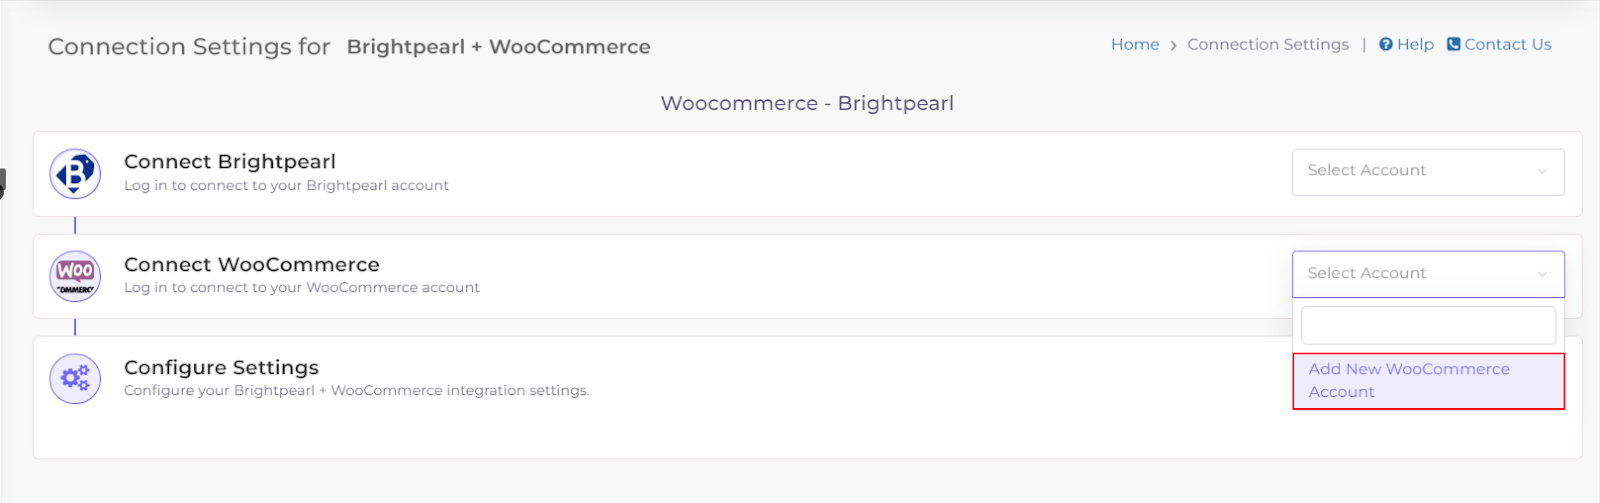
- Connect Both Accounts: You will be directed to a new page to connect both Woocommerce and Brightpearl accounts.
Connecting Brightpearl Account
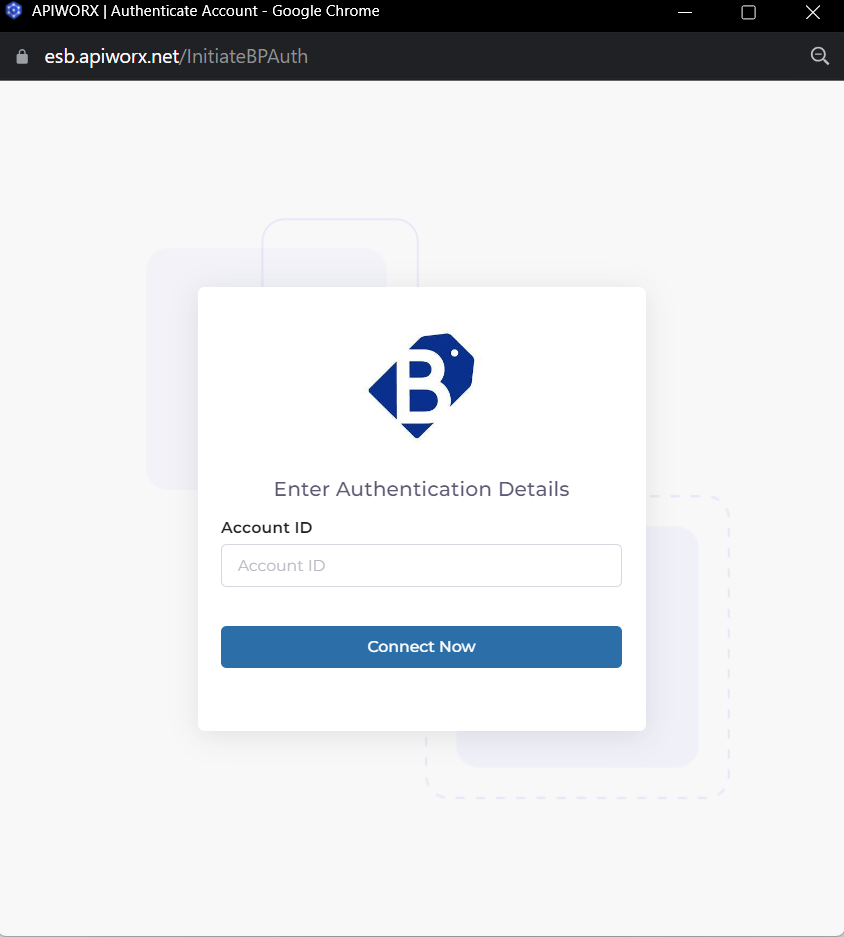
- Click "Add New Brightpearl Account" in the dropdown.
- Enter your Brightpearl Account ID and click "Connect Now".
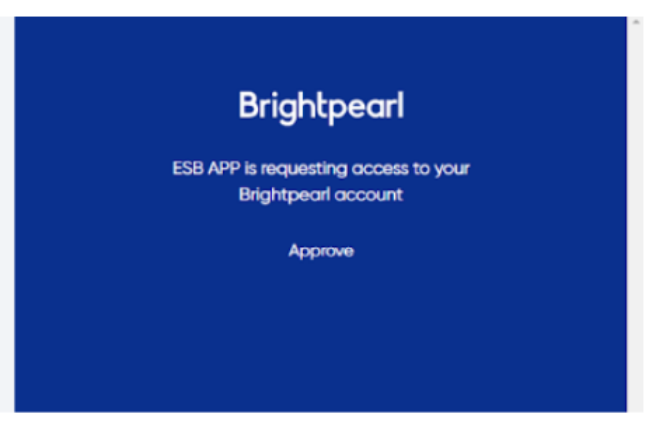
- Login using your Brightpearl account credentials.

- Click "Approve" to allow ESB access to your Brightpearl data.
Connecting Woocommerce Account
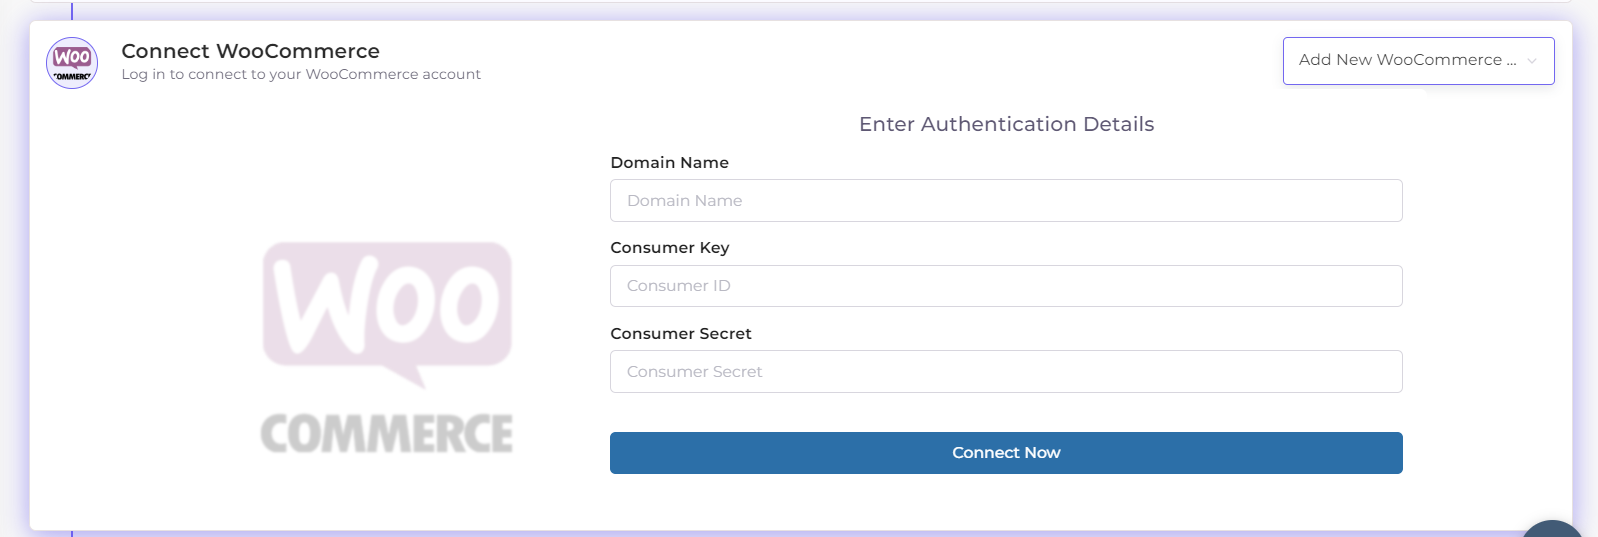
- Obtain the domain name, consumer key, and consumer secret from Woocommerce. Obtaining Woocommerce Consumer Key and Consumer →
- Add a new WooCommerce account in the connector.
- Enter the domain name, consumer key, and consumer secret. Click "Connect now" to allow ESB access to your Woocommerce data.
- Click the “Click To Proceed” button for mapping and configuration after connecting both accounts.
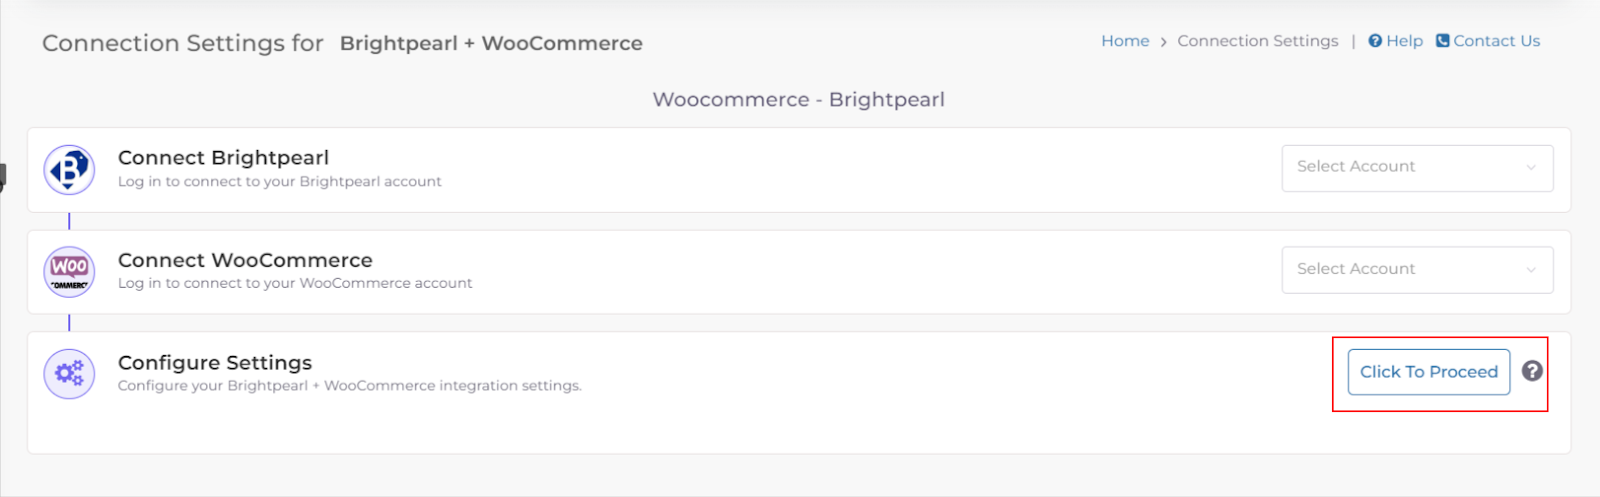
Configuration
The sync configuration page allows you to control and manage the configuration of various data types between Woocommerce and Brightpearl.
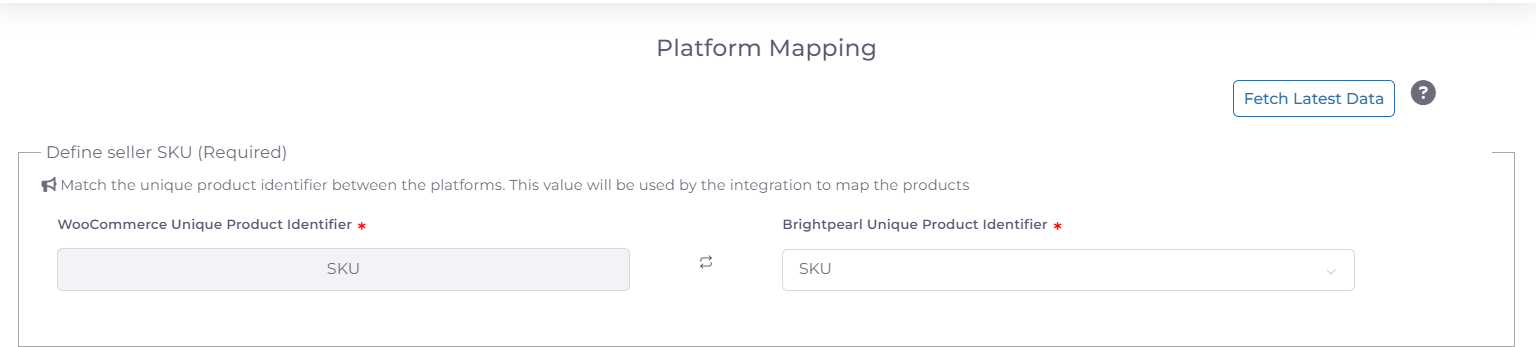
- Unique Product Identifier Mapping: Map unique product identifiers between Brightpearl and Woocommerce. You can map your Brightpearl and Woocommerce SKUs by selecting the values from the dropdown.
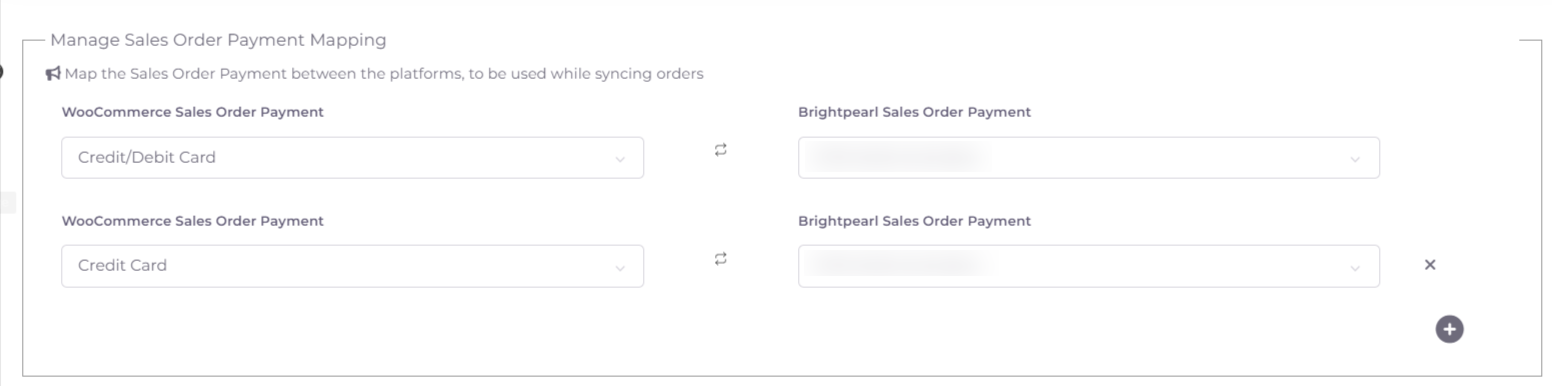
- Sales Order Payment Method Mapping: Map sales order payment methods between Brightpearl and Woocommerce. Select values from the dropdown and use the “+” button to add multiple payment method mappings.
Purpose: Ensures that payment methods applied in Woocommerce orders align with corresponding methods in Brightpearl during order synchronization.
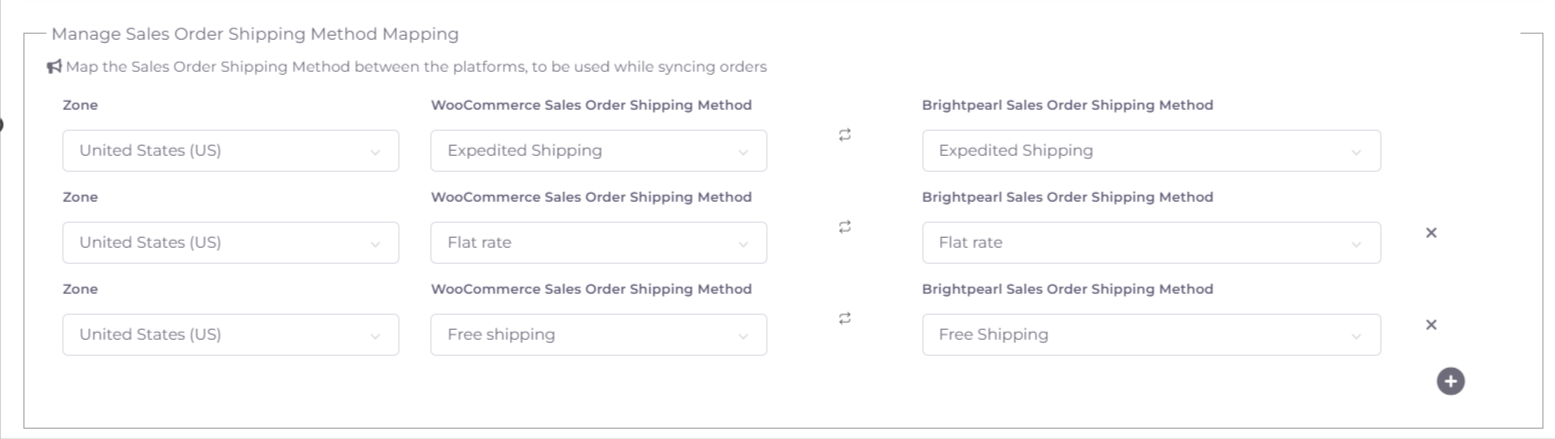
Purpose: Ensures that shipping methods applied in Woocommerce are mirrored in Brightpearl during order synchronization.
Purpose: Ensures that tax codes applied in Woocommerce orders are accurately reflected in Brightpearl during order synchronization.

Purpose: Facilitates synchronization of order details between Woocommerce and Brightpearl based on the mapped fields.

Purpose: Ensures that the pricing list applied in Woocommerce accurately reflects in Brightpearl for synchronized products.

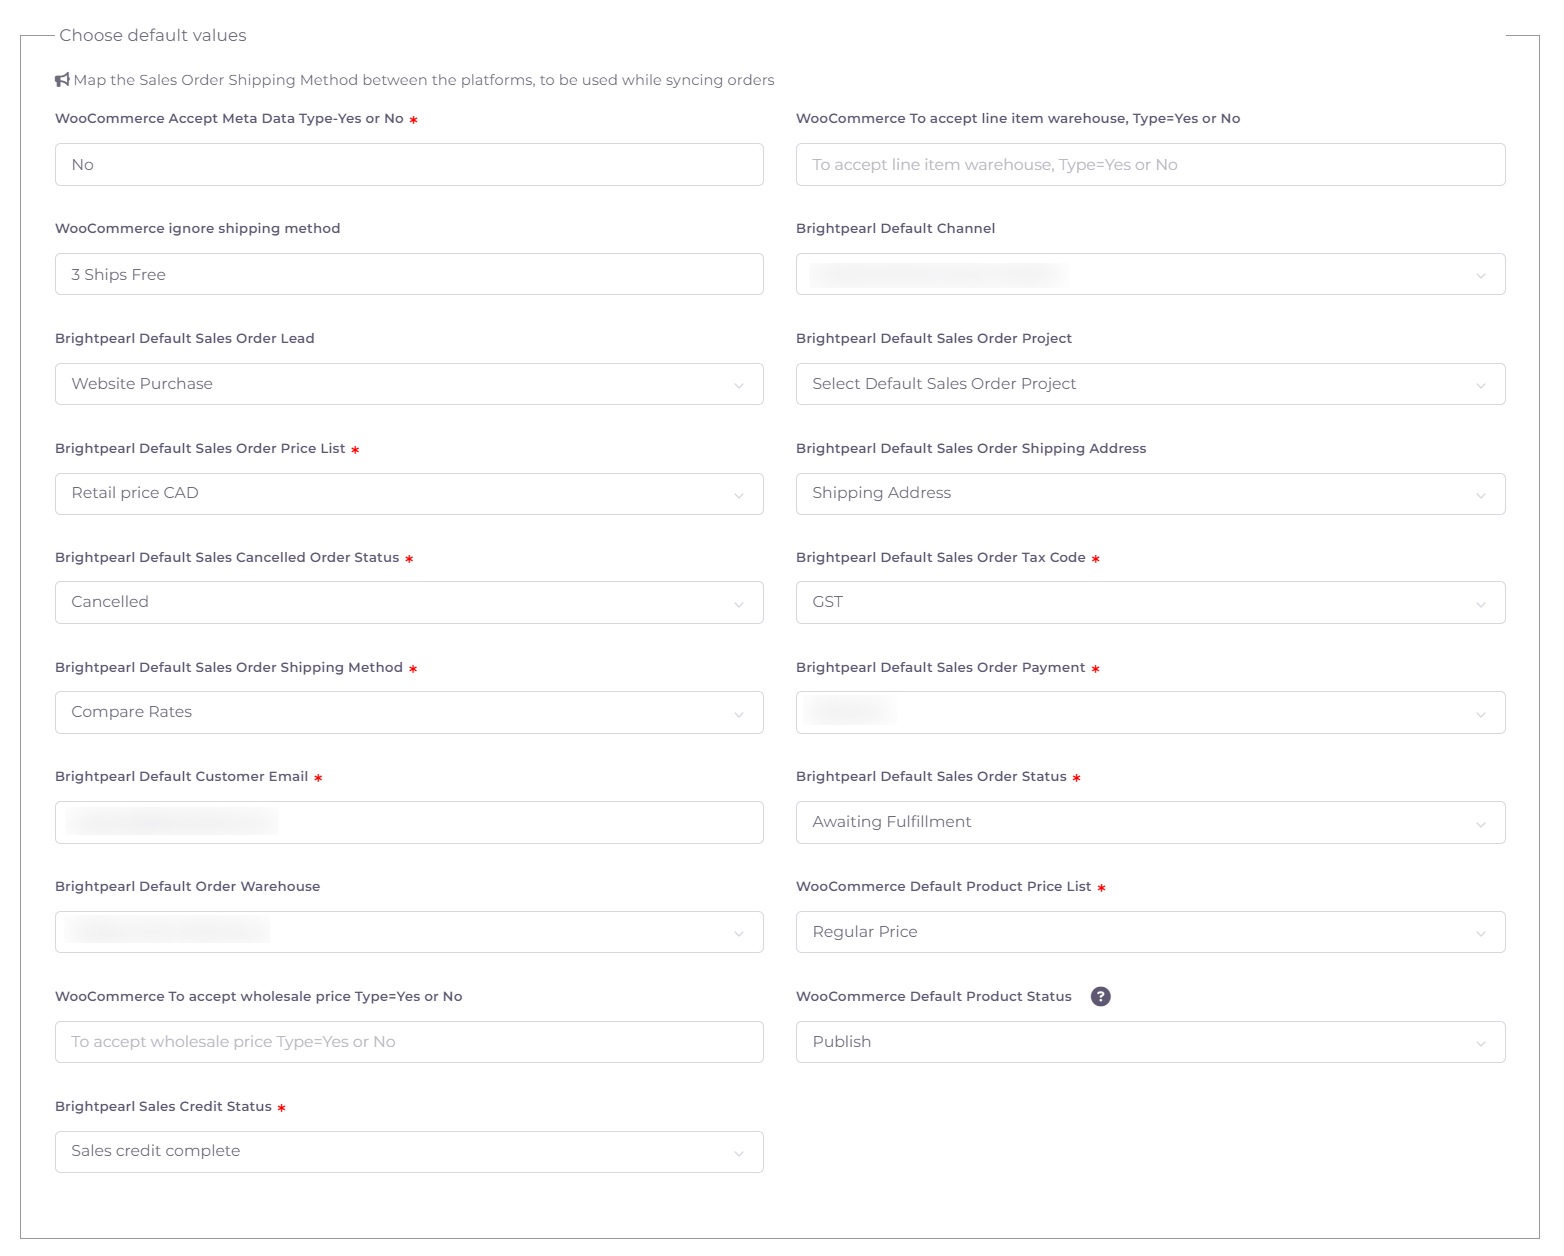
- Accept Meta Data from Woocommerce: Select if you want to accept metadata from Woocommerce. Set Type: Yes/No
- Accept Line Item Warehouse: Choose whether to accept warehouse information for each line item.
- Ignore Shipping Method: Specify shipping methods to be ignored during order sync. The connector will default to ignoring them and not syncing the selected shipping method in the order.
- Channel: Set the Brightpearl channel where you want your Woocommerce order details to be uploaded.
- Lead Source: Define a lead source for obtaining details about this connector, such as word of mouth or Google.
- Project: Set the project's status, e.g., if the project is in the testing period or going live.
- Price List: Set a default price list for use when creating orders in your selected Woocommerce location.
- Sales Order Shipping Address: Choose to sync either the Billing Address or Shipping Address with the order.
- Sales Cancelled Order Status: Define the status for a sales order when the order is cancelled in Woocommerce.
- Tax Code: Select a unique Tax Code that is assigned to contact records, product records, and transactions (controls the total tax rate applied to a transaction).
- Shipping Method: Set a default shipping method to always display in Woocommerce from Brightpearl while creating an order.
- Payment Method: Set a default Brightpearl payment method to be used by the system whenever an order's payment is synced from Woocommerce to Brightpearl.
- Customer Email: Add a default customer email address that will sync with the order.
- Sales Order Status: Define the default order status for sales order sync in Brightpearl.
- Warehouse: Set a default warehouse for use when creating orders in your selected Woocommerce warehouse.
- Shipping Address: Select a default shipping address to display in Brightpearl when creating a shipment for a sales order.
- Canceled Order Status: Define the status in Brightpearl for orders canceled in Woocommerce.
- Product Price List: Specify the price list for products during synchronization.
- Sales Credit Status: Select the default sales credit status that will sync with refunds created in Woocommerce.
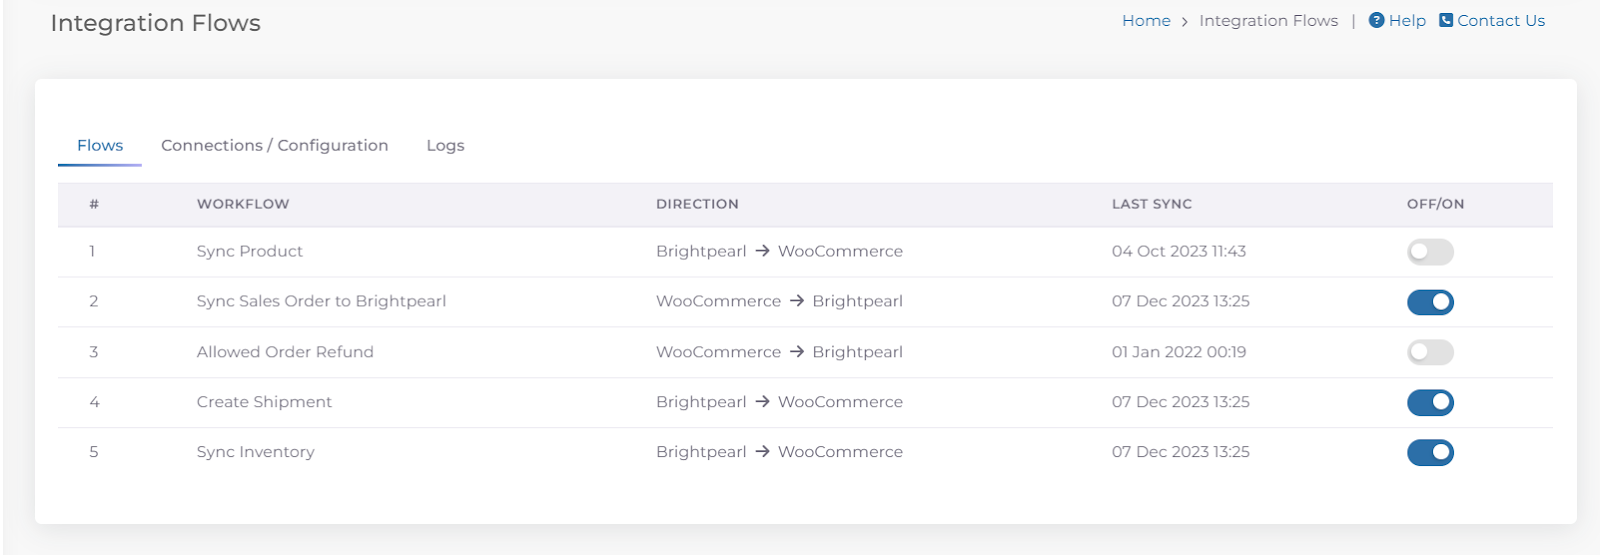
Flows
In this tab, users can control various data flows or actions associated with the connector. They can use toggle switches to enable or disable these flows as needed.